Thursday, January 31, 2013

The Green Machine: Pesto Pasta with Chicken and Peas

My very first no-recipe chicken concoction! Cooking how you feel is incredibly liberating and fun, and this recipe is super easy! I didn't use any measurements, but it's a very flexible recipe that you can play around with and jazz up as your heart desires!


Ingredients:

1-2 Tbsp butter
3 boneless skinless chicken breasts, cut into chunks
1 pound fun-shaped pasta
1 cup pasta water
1 batch of Basil Pesto
frozen peas (or any other green vegetable!)
Parmesan cheese for garnishing


Directions:

Cook pasta according to the package instructions until just al dente.

Meanwhile, in a large saute pan, melt the butter over medium heat. Add the chicken and cook for about 10 minutes. Be sure to flip each piece about halfway through.

Add the pesto to the chicken, and enough pasta water to reach your desired sauce consistency (my pesto was very thick, so I used almost a full cup). Bring the sauce to a boil and then reduce the heat and allow the sauce to simmer for a few minutes. Add the peas and pasta to the pan and allow everything to cook for another 1-2 minutes. Sprinkle with Parmesan and serve!


Wednesday, January 30, 2013

Banana Nutella Swirl Muffins for Habitat

Did your heart just stop after reading that title? Cause mine sure did.

While you may think a college student at a liberal arts school with no business, advertising or marketing classes, majoring in Art History and minoring in Archaeology knows nothing of the contemporary consumer market, I have picked up a few tricks. How do you squeeze money out of college students for a good cause? Simply add the word "Nutella" in front of anything and it instantly becomes more exciting and attractive. Nutella Banana Swirl Muffins? Nutella Cheesecake? Nutella Stuffed Chocolate Chip Cookies? Nutella Pie? Nutella Textbook? (if only) But in all seriousness, Nutella paired with almost anything is a dangerous combination. Especially Bananas. Though perhaps it's not quite as lethal as the simple Nutella and spoon combination. Don't leave this stuff lying around your house kids.


Needless to say, these were a killer at out Habitat Bake Sale. They are so delicious and smell so wonderful it is impossible to describe the joy they will bring you. I am so thankful for not only the amazing work Habitat does, but the fact that it gives me a chance to bake all these fabulous recipes without the danger of leaving them around the house for me to devour in my stressed out paper-writing moments.

And thank you so much to everyone who supported us today! We raised almost $100 (literally we made $99.19) for Habitat Newburgh to help them on their mission to build 10 homes a year!

So without further ado:


Recipe Adapted from {http://www.thenovicechefblog.com/2013/01/nutella-banana-swirl-muffins/#comments}

Ingredients


2 cups all-purpose flour
1 teaspoon baking soda
1 teaspoon baking powder
1/2 teaspoon salt
4 medium over-ripe bananas, all mashed up
1/2 cup sugar
1/2 cup packed brown sugar
1 large egg
1/4 cup vegetable oil
2 teaspoons vanilla extract
1/2 cup chopped pecans (optional)
Nutella


Directions


Preheat oven to 350°F. Line muffin pan with liners.

In a medium bowl, whisk flour, baking soda, baking powder and salt until well combined. Set aside.

In large bowl, whisk together banana, sugar, brown sugar. Beat in egg, vegetable oil and vanilla extract. Slowly whisk in the flour mixture until just combined. Fold in pecans (optional).

Fill muffin tins 3/4 full. Top each muffin with about 1 teaspoon of Nutella and use a toothpick to swirl it into the batter.

Bake muffins for 15-17 minutes, or until a toothpick inserted in the center comes out clean.

Serve warm or store in an airtight container.

~Makes 18 Muffins


Friday, January 25, 2013

Indian Butter Chicken

What happens when I am feeling crazy adventurous and its the middle of winter with no mountains to climb nearby? Well, on this particular day, I went to the store and bought Indian spices. And RAW chicken. We're not talking the pre-cleaned, pre-trimmed and pre-seasoned chicken breasts I slap onto my George Foreman, but kind that you actually have to prep yourself. Granted, my wonderful mom cleaned and cut the chicken for me, but that was only in the interest of saving time. Well let's pretend that was the reason anyway, there is only so much adventure one can take in a day.


But back to the fact that I just made Indian food, from scratch, and it was amazing. Butter chicken is the perfect starter Indian dish. It's insanely delicious and not horrendously complicated. The most genius part of this recipe is that is makes an unbelievable amount of sauce, and while it initially looks like your chicken is just swimming in a pool of orangey, browny, deliciously smelling smooth and silky sauce, you will promptly mop it up in its entirety with your (homemade) Naan.

This dish can be a little expensive if you don't have these spices on hand, but I highly recommend investing in them for the long run: you will want to make this again and again (and again). The Garam Masala is the key spice in this dish. My cooking has seriously been missing out on the incredibly aromatic spices and flavors of the world. Who knew you could season a dish with something other than basil? (#collegecookingproblems)


Recipe Adapted from {http://notcrocker.com/2012/08/04/homemade-butter-chicken-and-naan/}

Butter Chicken Ingredients

For the Chicken:
2 lb boneless, skinless chicken breast, cut into small pieces
3 garlic gloves, minced
1 tsp ginger paste
2 tsp chili powder
1 tbsp coriander
1/2 tsp salt
3 tbsp vegetable oil

For the rest of the Sauce:
3 tomatoes, cut into small pieces
1 large red onion, chopped
3-4 garlic cloves, minced
1 tsp ginger paste
2 green chilis, diced
1 tsp cumin seeds
2 tsp chili powder
1 tbsp coriander
1/2 tsp fenugreek seeds (I omitted these to save a little money)
1/2 cup heavy or light cream
1 tbsp dark brown sugar
1/2 stick unsalted butter
1/4 cup cashew nuts
salt to taste
1 tbsp garam masala
1/4 cup parsley, chopped for garnish
2 – 4 cups water


(I highly recommend preparing and chopping all your ingredients first, it will make everything run so much smoother. Also prepare your Naan dough before you begin the chicken, as it requires an hour to rise)

Mix together the first section of ingredients, the chicken, garlic, ginger, chili powder, coriander, and salt. Make sure the chicken is well coated.

Heat up the oil in a large skillet, add the chicken and cook for about 7 minutes; remove from skillet.


In the same skillet, add the cumin seeds, onion, and remaining garlic and ginger and sauté for a couple minutes, until the onion is slightly translucent. Add a two cups of water and stir.


Add the cashew nuts, coriander powder, chili powder, (fenugreek seeds), chopped chilis, and tomatoes, stir well.


Cook the sauce over medium-low heat for about 30 minutes. While the sauce is cooking, start your Basamati rice.


Pour the sauce in a blender (or use an immersion blender right in the pot) and blend it until it’s nice and smooth. Pour the sauce back in the skillet.


Add another cup of water and the butter (I found my sauce was just a little too watery, start by adding only 1/2 a cup, and taste test to see if you need more).  Add the brown sugar and salt to taste.


Add the cream and the chicken to the sauce. Cook for about 15 minutes, stirring occasionally. Meanwhile, heat up your frying pan and start cooking the Naan!


Add the garam masala and stir well. Taste for salt, add as needed. Garnish with fresh parsley.


~Serves 3-4 people, best with Basamati Rice and Naan


 Why yes, I did use an ice-cream scooper to make that perfect ball of rice


Naan Ingredients

2 tsp dry active yeast
1 tsp sugar
1/2 cup lukewarm water
2 1/2 to 3 cups flour
1/2 tsp salt
1/4 cup vegetable oil
1/4 cup plain yogurt
1 large egg

In a small bowl, combine the yeast, sugar, and water. Mix well and let sit for about 10 min until frothy on top.

In a large bowl, combine the yogurt, oil, and egg and whisk well. Pour in the yeast mixture and whisk to combine.


Mix the salt into your first cup of flour. Add this first cup to your wet ingredients and stir until well combined. Continue by adding the flour, half a cup at a time, until you can’t stir it with the spoon any longer. 


Turn the dough onto a floured surface and knead, adding flour until the dough no longer sticks. It is likely that you will use the full 3 cups. The dough should be nice and soft but not sticky.
 

Place the dough in an oiled bowl and cover it with a clean kitchen towel, letting it rise until doubled in size, about an hour.

After it rises, cut the dough into 8 equal pieces and shape each piece into a small ball.


Heat a large skillet over medium heat and spray with non-stick spray. Roll out one ball at a time until it’s about 1/4 inch thick and about 5 inches in diameter. Place the rolled out dough onto the hot skillet and cook until the bottom side is golden brown and you should see large bubbles forming on the surface. Flip the dough and cook the other side until it’s golden. Butter them as they come off the skillet.


Thursday, January 24, 2013

Not Your Average Reese's Cup: Peanut Butter Chocolate Chip Cookie Dough Cups

Clearly my affinity for baking has been taking over this blog, but hopefully you've all given up on your New Years Resolutions to "eat better" because everything you think you know about your life will change once you've tasted one (or three) of these. You thought Reese's were the ultimate candy? (If you don't we probably can't be friends). Homemade Reese's you say? That sounds pretty good huh? Oh no no, you poor, naive child. This recipe could solve world peace. It's literally the best thing to come along since, okay, well since Reese's cups. But these are on a whole other level. We are talking about the fusion of the two greatest baking inventions of all time. Chocolate and peanut butter, and chocolate chip cookie dough. Oh Yes. Dangerously Delicious and Adorable. Bake with caution.


Recipe Adapted from {http://www.howsweeteats.com/2012/03/chocolate-chip-cookie-dough-peanut-butter-cups/}


Ingredients

2 1/2 cups milk chocolate chips 1/2 cup unsalted butter
1/3 cup packed brown sugar
1 teaspoon vanilla extract
1/4 cup creamy peanut butter
3/4 cup powdered sugar
2 tablespoons all-purpose flour
1/4 teaspoon salt
1/2 cup mini chocolate chips


In a small saucepan, heat butter until melted. Whisk in brown sugar until dissolved, then let it bubble for 1-2 minutes. Remove from heat and whisk in peanut butter. Whisk in vanilla. Let sit and cool completely, about 20 minutes.

Line a mini muffin with with 24 liners. Melt 1 1/4 cups of chocolate chips using a double broiler method. Drop 1/2-1 teaspoon of chocolate into each liner, then use a pastry brush to brush chocolate up the sides of the liner. Place in the freezer for 20 minutes. 


By now your butter and sugar mix should be cool. Transfer to a mixing bowl and whisk in powdered sugar, salt and flour, until combine and few lumps remain. Fold in mini chocolate chips. (If the dough is too wet, you can pop it in the fridge for 15 minutes, but I found mine was still workable.)
 
Remove the muffin tin and place 1 teaspoon of cookie dough into the chocolate cups (press down only very lightly!). Place back in the freezer for 10-15 minutes. 

Melt the remaining chocolate chips, then cover each cookie dough top with chocolate, smoothing with a spoon. Freeze again for 15-20 minutes. 

Store at room temperature for up to a few hours, or store in the fridge.

~Makes 24 Cups


 Aren't miniature baked goods just adorable?

Friday, January 18, 2013

FUDGY Brownies

Fudgy vs. Cakey Brownies. It's a very touchy subject. Personally, I like them somewhere right in between. But in my quest to find that perfect balance, and with a contingency of friends and family who feel rather passionately about one or the other, I shall endeavor to create both extremes. These obviously fall into the Ultimate FUDGY camp. Literally, I don't think they could be any more rich, melty and solidly chocolatey.

There are two keys to fudgy brownies: fewer eggs (these have 2) and a small ratio of flour to fat and chocolate. Since the batter of fudgy brownies is so dense, it's also important to beat it vigorously to ensure that it is nice and smooth.

The last time I made brownies I was a very greedy girl and tried to turn them out from the pan far too early. Literally the entire half top of the brownies fell onto the counter, and I pathetically tried to piece it all back together. Thank god brownies are all about delicious chocolateyness and it doesn't really matter how pretty they look. But you really should wait that hour for the brownies to cool so they are easier to cut and the flavor has a little time to set (and so you aren't that sad puppy frantically scooping up every last crumb from the counter trying to make sure no ounce of brownie was wasted)


Recipe Adapted from {http://www.marinmamacooks.com/2011/12/roberts-absolute-best-brownies/}


Ingredients

6 Tbsp unsalted butter, cut into pieces
8 oz bittersweet or semisweet chocolate, chopped - I recommend Ghirardelli 60% bittersweet baking chocolate
3/4 c sugar
1 tsp pure vanilla extract
2 eggs, at room temperature
1/4 c all-purpose-flour
1 c semisweet or bittersweet chocolate chips - I recommend Ghirardelli 60% bittersweet chocolate chips


Preheat oven to 350 degrees. Chop up the dark chocolate baking squares. (it's easiest to do this on top of a piece of parchment paper - it makes cleanup easy, and ensures you get every little shard of chocolate into the pot)
 
Line the inside of an 8 or 9-inch square pan with 2 lengths of foil or parchment paper, positioning the sheets perpendicular to each other and allowing the excess to extend beyond the edges of the pan. Then lightly butter the foil or parchment paper.  

Melt the butter in a small saucepan. Add the chocolate and stir constantly until it's melted and smooth. Remove from heat and pour the chocolate and butter mixture into a bowl.

 
Add the sugar and the 1 teaspoon vanilla to the melted chocolate and mix until combined.
Then beat in the eggs, 1 at a time. 

Add the flour and stir the batter vigorously for 1 whole minute (it will be the longest minute of your life) until the batter loses it graininess, becomes smooth and glossy, and pulls away a bit from the sides of the bowl (work those arm muscles!) (This ensures that the batter will be rich, thick, satiny smooth, and glossy and that the brownies will be rich and fudgy.)

Pour the batter into the pan and pop it in the oven Bake until the center feels almost set and the edges are a bit firm, about 30-35 minutes. (it will appear molteny don't worry!)

Let the brownie cool completely in the pan (wait for about an hour - don't be a greedy bear!) before lifting the foil or parchment paper with your delicious brownie out of the pan. Enjoy with vanilla ice cream or milk!

Makes 16 dense, moist, delicious brownies!


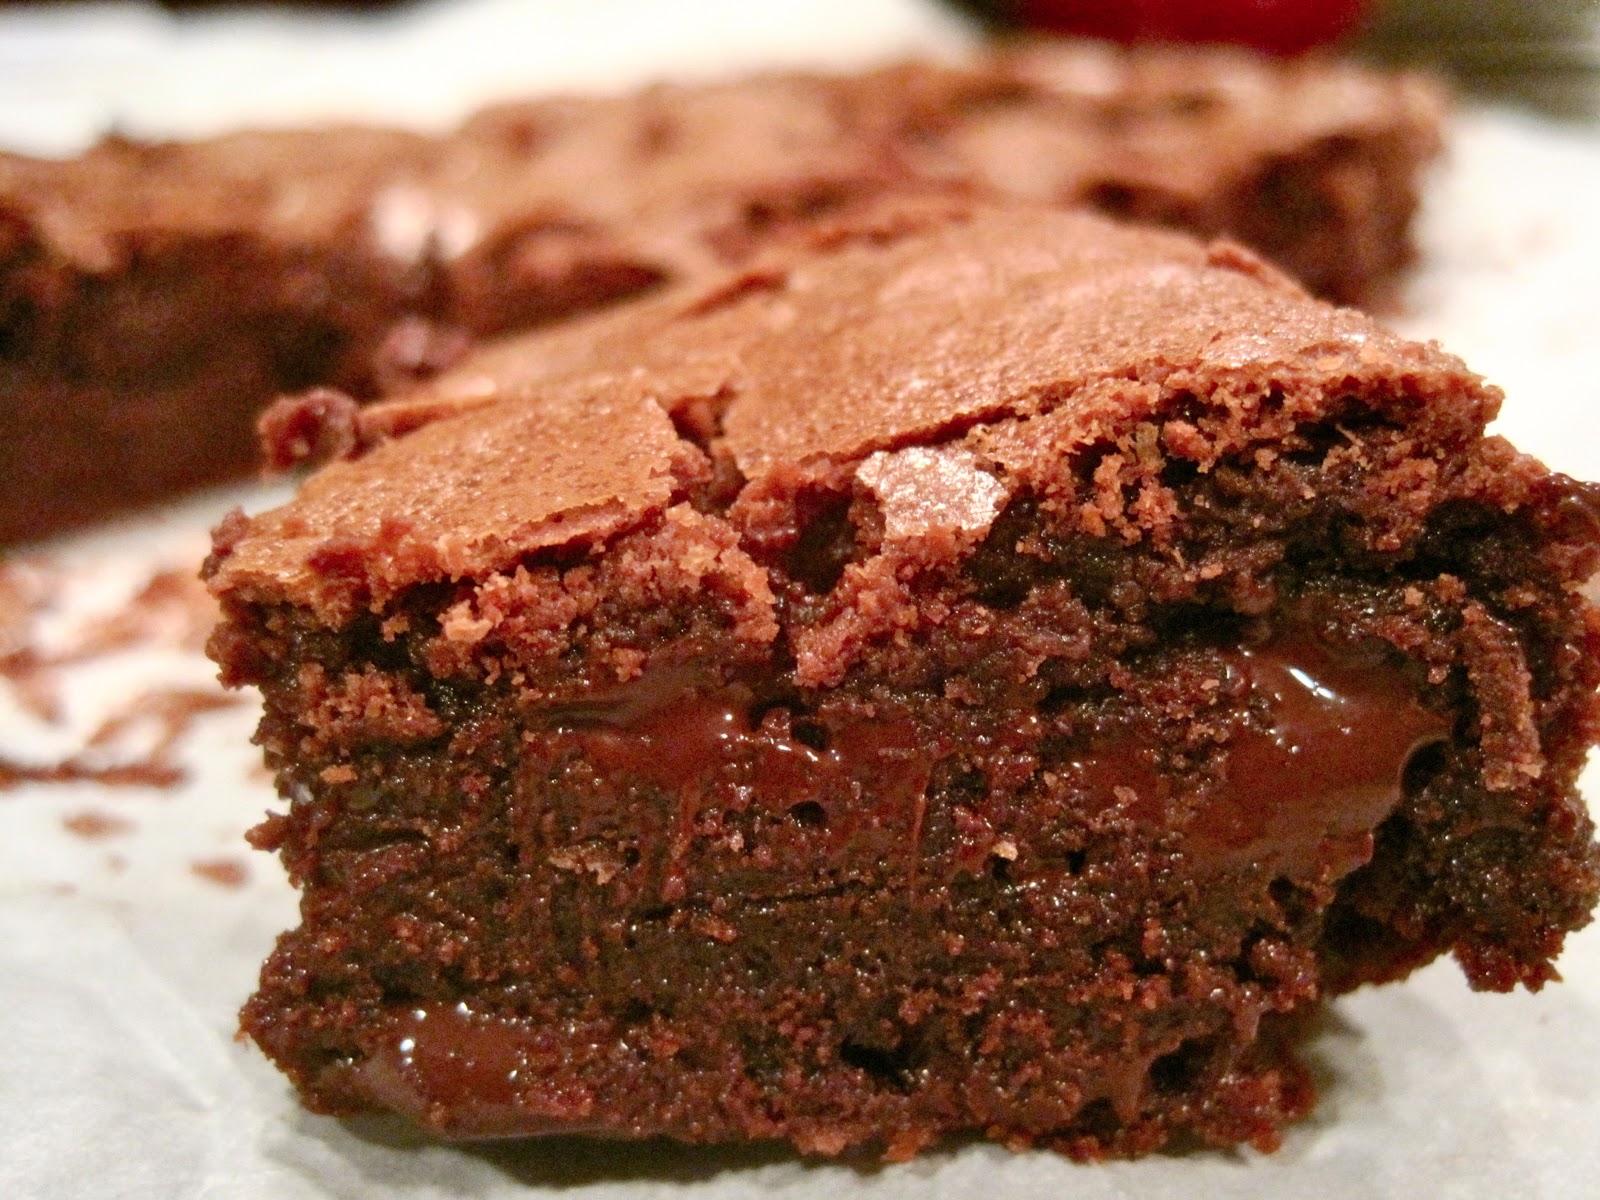
Look at those dripping chocolate chips


You can never have too many pictures of brownies


Pure chocolate goo

Wednesday, January 16, 2013

Buttermilk Breakfast Biscuits


As this is my second biscuit recipe out of only about 20 recipes on this blog, there is clearly a special place in my foodie heart for biscuits. There is just something so satisfying about the dry, buttery flakiness of biscuits and scones. And the jam, let's not forget about that sweet, sticky pile of bliss.

I usually feel like a dying fish flopping out of water when I try to make pastry dough. Or Chemistry Dog. I literally have no idea what I'm doing. But if you have a food processor, or actually know what you are doing, you will save yourself a huge cleanup and an extra shower. I had a tougher time than usual with this one (and by tough time I mean I had dough sticking to every inch of me and my kitchen counter). But although the dough turned out to be way too wet and sticky, after dousing it in flour and folding it in a few times, things managed to get back under control. And, even better, the biscuits were still delicious! So don't worry, even if you have no clue what you are doing, just follow these instructions and you too can fool everyone into thinking you are a pastry goddess. 


 Recipe Adapted from {http://www.omnivorousfox.com/2012/12/flaky-buttermilk-biscuits.html}


 Ingredients:
1 and a scant quarter cup all-purpose flour 1/2 c cake flour
1 tbsp sugar
1 and 1/4 tsp baking powder 1/4 tsp baking soda 
3/4 tsp salt 
1 stick cold butter (make sure the butter is very cold!)
3/4 c buttermilk


(If you have a food processor, see the link above for instructions to make the dough in your food processor)

Preheat the oven to 425 degrees and line a baking sheet with parchment paper.
 

Whisk together the all-purpose flour, cake flour, sugar, baking powder, baking soda and salt in a large bowl.

Cut the butter it into very small pieces
and combine into the flour mixture with your fingertips until you have large course crumbs. Pour in the buttermilk and mix with a spatula until the dough forms (I recommend waiting to pour the last bit of the milk from the measuring cup to see if your dough needs it)


Dump the dough onto a floured surface and pat into a rectangle, about 3/4 in thick. Fold in thirds like a letter and pat down into a rectangle again. Repeat two more times, adding more flour to the surface each time to keep it from getting too sticky. 

Cut into 6 rectangles or use the mouth of a glass to cut the dough into circles. Brush the tops with an egg/milk mixture if desired and bake for 15 minutes or until golden brown.

Makes 6-7 Biscuits