Sunday, October 6, 2013

Quinoa with Roasted Vegetables

This is a very simple and healthy dish that you can have a lot of fun with. I roasted up some peppers, carrots, and onions, and then chopped up some sun dried tomatoes for a little sweet pop, but you could also try roasting eggplant, zucchini or any other root vegetables. Next time I will definitely be reaching for some butternut squash.

My pepper-roasting technique, however, leaves a lot to be desired. I tried roasting them for about 50 minutes, at which point my lovely internet sources claimed the skins would magically peel away, but I had no such luck. The kitchen turned into a bit of a hot mess as I ingeniously tried to cut the peppers out of their skins, which of course was a slippery disaster, but I managed to glean enough pepper pieces for the photo. I think I will try broiling the peppers next time so the skin gets really really charred, but until I master the process I'm settling for Trader Joe's canned roasted peppers.


Ingredients:


(This is really just a go with what you feel recipe, just keep experimenting until it tastes good to you!)

1 c Qunioa (I like to use a prewashed brand, like Ancient Harvest)
2 c chicken broth (or water)
1 large onion, quartered
Carrots, peppers or other roast-able vegetables


3 Tbsp Olive oil
1 Tbsp Lemon juice
Season with cumin, garlic powder, salt and pepper to taste


Directions:

  1. Preheat oven to 375 degrees Fahrenheit
  2. Line a baking sheet with foil, chop vegetables as necessary, toss with olive oil, salt and pepper and back for 45 minutes to an hour (remove onions after about 30-35 minutes. Rotate veggies  halfway through
  3. Make quinoa according to package instructions (I like to cook mine in chicken broth instead of water for a little extra flavor, but water works just fine)
  4. Whisk together the dressing ingredients
  5. Once the vegetables are soft and tender, chop up further if necessary and toss with quinoa and dressing

Makes 4-5 servings


I was so excited to find these fancy mini carrots at whole foods!


yum.


Sunday, August 4, 2013

Mini Flourless Molten Lava Cakes


Of course these are not to be confused with the Chocolate Molten Lava Cakes or the Flourless Molten Lava Cake Cookies. For all of you not yet ready to stock your pantry with those almond, barley, and brown rice flours (I'm still deciding if I am on that list), here is another flourless recipe for all you Gluten-Free bakers out there looking to cheat the system. I may have slightly over-cooked them as the inside didn't have that satisfying ooze of liquid chocolate, but they were still moist, dense, delicious and, most importantly, adorably mini-sized.


Recipe From: http://www.mayaskitchen.info/2013/05/09/lava-chocolate-cakes-from-chef-michael-smith-sweet-impressive-and-gluten-free/
 

Ingredients:


8oz semi sweet or dark baking chocolate (I used Bittersweet Ghirardelli)
½ Cup (2 sticks) Butter, softened
2 Tbsp Cocoa Powder
4 eggs
¼ Cup Sugar
1 Tbsp Vanilla Extract


Directions:

  1. Preheat oven to 400°F
  2. Melt butter and chocolate completely in a small saucepan over low-medium heat. Remove from heat and stir in the cocoa powder until smooth.
  3. Using an electric mixer, beat the eggs with sugar and vanilla extract until thick and smooth.
  4. Pour the chocolate mixture into the egg mixture and stir until smooth 
  5. Divide the batter evenly between the muffin cups, filling each about ¾ full
  6. Bake for 8-10 minutes (I found 10 minutes was a bit too long). The cakes are ready when the tops have just started to crack, the edges are set and the the center still looks wet.
  7. Cool for a few minutes, and then use a knife to help you pop the cakes out of the muffin tin.  
  8. Serve with a heaping scoop of vanilla ice cream.   
Makes 6-8 cakes (I doubled the batter and got 16 cakes)


These were so good, I made them again, this time with a little raspberry topping!


Chinese Chicken and Broccoli


After the Indian Butter Chicken recipe I made a few months ago, I have fallen in love with the idea of making my own versions of Asian dishes (or at least American-ized Asian dishes) at home. It's nice to know (and control) exactly what is going into your food, and this dish will leave your craving for Chinese food (immensely) satisfied without the guilt!


Recipe From: http://www.ateaspoonofhappiness.com/chinese-chicken-and-broccoli/
 

Ingredients:


For the marinade:


1/2 teaspoon baking soda
1 teaspoon sugar
2 teaspoons cornstarch
1 tablespoon soy sauce
1 tablespoon water
2 tablespoons vegetable oil

For the sauce:


1/4 cup + 1 tablespoon low-sodium soy sauce
2 tablespoons brown sugar
4 cloves garlic, minced
2 tablespoons flour
1 tablespoon rice vinegar

1 tablespoon vegetable oil
2 boneless, skinless chicken breasts, cut into bite-sized pieces
1 large head of broccoli, crowns only, cut into bite-sized pieces.
1 tablespoon water


Directions:

  1. Mix the marinade ingredients in a small bowl. Pour the marinade into a large Ziploc bag with the chicken and let marinate while you prepare the sauce and broccoli
  2. Steam broccoli for just 3 minutes and then set aside.
  3. Mix together the sauce ingredients in another bowl.
  4. In a wok or large skillet over medium-high heat, saute the chicken with its marinade and 1/2 of the sauce mixture in 1 tablespoon vegetable oil.
  5. Once chicken is fully cooked through, add the steamed broccoli, remaining sauce and 1 tablespoon of water.
  6. Cook for 2 more minutes to thicken sauce or until broccoli is tender, but still crisp.
  7. Serve with Basmati rice.
Makes about 4 servings


Flourless Molten Lava Cake Cookies


Until my recent (and short-lived) soiree with a Gluten-Free diet, I used to wonder why anyone would go through the hassle of trying to Gluten-Free-ify baked good recipes when you could just make flour-less chocolate anything instead. All the rich decadence you could ever desire and still tastes amazing? Yes Please.

Of course, there is the argument that we need more than dense chocolatey baked goods to fulfill our lives. (But do we really?)

But experimenting in the kitchen is a wonderful thing, and future Gluten-Free experiments definitely lie ahead, but for now I shall share with you this incredible treat for all of those Gluten-Free (or Lactose-Intolerant!) friends you love.

These come out of the oven completely molten on the inside, and are so rich you may be satisfied with just one (and a half). Plus their snow capped tops crinkle in the most enticing fashion.


Recipe Adapted From: http://www.picklee.com/2012/02/07/deep-dark-chocolate-cookies-butter-flourless/


Ingredients:


*1 1/2 cups bittersweet chocolate chips (divided)
3 large egg whites, room temperature
 2 cups powdered sugar, divided (plus 1/2 cup for cookie coating)
1/2 cup unsweetened cocoa powder
1 tablespoon cornstarch
1/4 teaspoon salt


*I have made these with bittersweet (60%), 53% and Semi-Sweet chocolate chips. All three were delicious, but I think the 53% were my favorite, the 60% is almost a little too intense for my taste.


Directions:

  1. Preheat oven to 350°F. Spray or cover two large cookie sheets with parchment paper.
  2. Melt 1 cup chocolate chips using a double broiler on the stove, stirring frequently, about 2 minutes. Set aside to let cool.
  3. Using an electric mixer, beat whites in large bowl until they form soft peaks. (This takes a while, so just keep at it!) Gradually beat in 1 cup sugar. Continue beating until mixture resembles soft marshmallow cream.
  4. In a separate bowl, whisk together the sugar, cocoa, cornstarch and salt. 
  5. On low speed, gradually add these dry ingredients into the marshmallow cream mixture.
  6. Add remaining 1/2 cup chocolate chips to lukewarm melted chocolate 
  7. Add chocolate/chocolate-chippy mixture to cream/flour mixture and blend well (the dough will become very stiff).
  8. Pour the remaining 1/2 cup powdered sugar on a paper plate. Roll rounded tablespoons of dough into ball; roll in sugar, coating thickly (don't skimp on the sugar, otherwise they will not look as pretty when they come out of the oven!) 
  9. Bake until puffed and tops crack, about 10 minutes. Let cool (if you can resist) and enjoy!

Note - these are best fresh from the oven as the insides will be entirely molten. They are still delicious for a few days after, but the insides will harden to a soft, solid chocolate.

Makes About 24 Cookies


Happy Birthday Frances!


Thursday, June 27, 2013

Father's Day Popovers and Homemade Iced Tea


Bringing a little taste of Bar Harbor, Maine home with Jordan Pond House inspired Popovers, Rock Scramble-d (get it?) eggs, an Acadia Fruit Mountain and Homemade Iced tea! These popovers were a little tiny and lacked the trademark "poof" of its non-muffin-tin-made twin, but that just means that you get to eat five of them right?


Popovers:


Ingredients: 


Recipe Adapted from http://thekitchykitchen.blogspot.com/2013/02/popovers.html 

2 cup milk
2 eggs
1 tablespoon butter, melted

1/2 teaspoon salt
1 cup flour
Butter for greasing 


Directions:


Preheat the oven to 425 degrees. Whisk together the eggs, then add the milk and melted butter. Whisk together the flour and salt in a separate bowl, and add into the liquid mixture, beating only enough to combine (there should still be some lumps!)

Grease the popover (or muffin) pan and place in the oven for 2 minutes. Remove (careful - it will be a bit smokey!) and immediately fill them 1/2 full with batter. Back for 15 minutes, then turn the oven down to 350 and bake for 10-15 more minutes. Remove from the oven and poke the tops with a knife to let the steam escape.

Makes 6 popover-sized or 12-muffin sized popovers


Iced Tea:


Ingredients: 


6-8 bags of black tea (I used Twinings Earl Grey)
4 cups water
1/8-1/4 cup sugar
Lots of ice cubes
Lemon, peach, or other fruit for garnishing (or flavoring!)


Directions:


Boil the water, then add the tea bags and let steep for 5 minutes with the lid on. Remove the tea bags, add in the sugar, and then pour into a heat safe container that is 1/2 - 3/4 full of ice and place in the fridge to cool (about two hours, or overnight). 

**As you are quickly changing the temperature of the tea be sure your pitcher and withstand the change. I unfortunately awoke to found our only glass pitcher had cracked in our fridge during the night. If you are worried about your pitcher (or don't have one) just pour the tea into individual glasses full of ice (or use a pot!). But at least I know what I'll be getting my dad for Christmas this year!


It's not quite a view of that rocky Maine coast, but
Happy Father's Day Daddy!


Friday, May 10, 2013

The FrankenCake - A Vanilla Cream-Filled Chocolate Cake for "Two"

It's about time for a Valentine's Day post right? Let's just site the frenzied panic of job applications, final papers, exams, and the omnipresent graduation ceremony that looms not too far away as a few of the reasons for the complete lack of cooking in my life. Though catching up on the entire last fours seasons of Fringe may be another.

What have you missed? Let's see. Countless boxes of pasta. And I only say countless because it is actually less shameful than admitting the real number of boxes I have consumed. Aside from discovering the wonders of squash and carrot veggie pasta, however, only two major culinary events have occurred in my life since my last post.

A) Roasted Asparagus is the only vegetable (and/or food) that should ever be consumed because it is just that delicious.

and

B) The possible discovery of my favorite chocolate chip cookie recipe of all time (as I'm sure my housemates wouldn't mind attesting to)

But let's save that for the next blog post. For now we turn to the FrankenCake.

When you are an art history major, sometimes you can only describe things with art lingo. Clearly I've studied too many Italian Renaissance Villa gardens this semester because the only word I can come up with to describe this cake is Grotesque.

Remember that time (back with those fudge brownies) when I told you not to be a greedy bear and let your brownies cool for an hour, so that the whole top half doesn't fall off when you flip over the tin? Apparently that rule about letting your cakes cool completely before frosting them holds the same merit.


But despite being a lopsided, melty, oozing mess that broke all laws of physics by standing as long as it did, the cake was not only insanely fun to make, but just ridiculously hilarious to attempt to eat. And, as you can probably tell, this "cake for two" could feed an army.

While the FrankenCake was really good, I think I would recreate each component more to my tastes next time. The mayonnaise addition was a little too overpowering, and I wasn't a huge fan of the gelatin based cream filling. I think a classic chocolate cake with a butter cream filling would have been delicious smothered in the ganache avalanche.


For the recipe  see: http://sweetapolita.com/2013/02/vanilla-cream-filled-double-chocolate-cake-for-two/
 It even looks like a little monster doesn't it?


If you actually wait for your cakes to cool, you will have gorgeous little puffs of white filling separating each layer like a pillow of clouds.


Happy Valentine's Day!


Friday, February 1, 2013

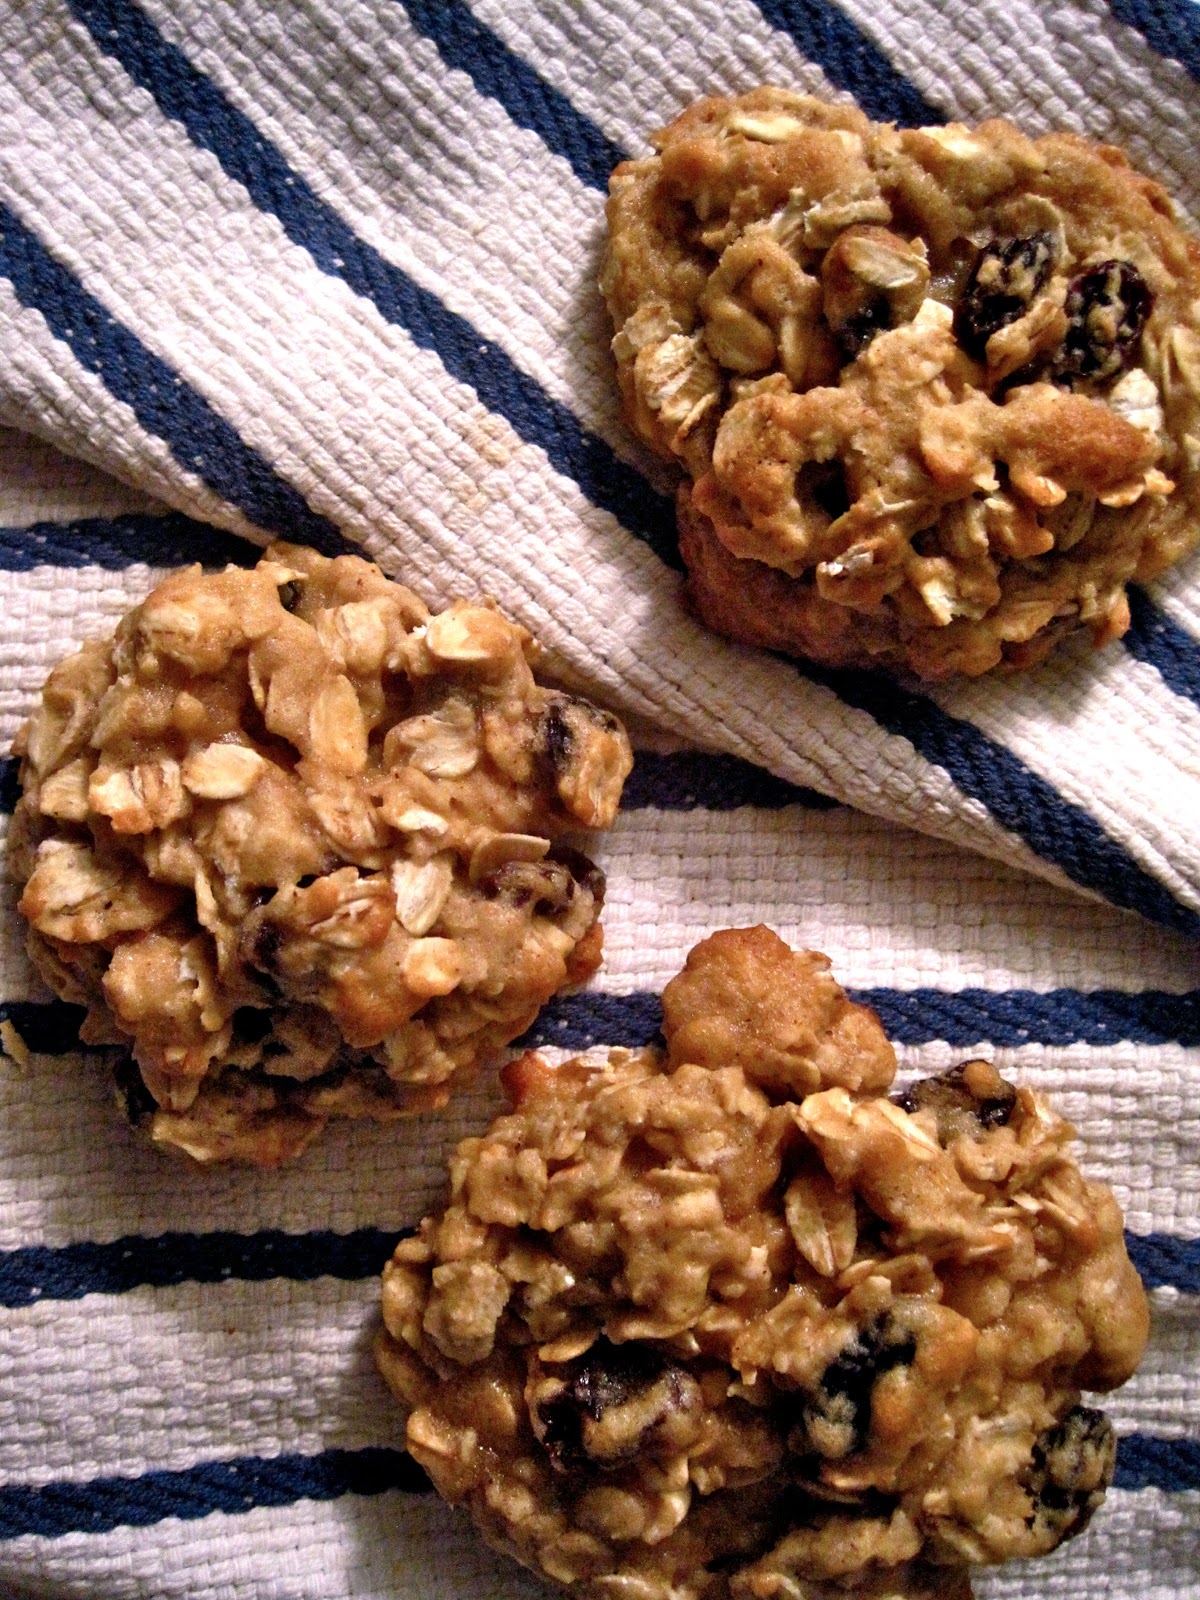
Happy Birthday Oatmeal Raisin Cookies!

Only in writing out the recipe for my blog did I realize I accidentally drastically altered my favorite go-to-no-fail Oatmeal Raisin Cookie recipe. Perhaps for the better? I completely forgot to add the additional 6 Tbsp of butter, and guess what? They were still Ah-mazing. Who knew? I did notice they were a little bit drier when shaping the dough into balls, but I think these "healthier" (if we can call them that) cookies were only just shy of the perfection of the original recipe. Happy Happy Birthday Lauren!


Recipe Adapted from the Quaker Oats Recipe


Ingredients:

1/2  cup (1 stick) plus 6 tablespoons butter, softened
3/4  cup firmly packed brown sugar
1/2  cup granulated sugar
2  eggs

1  teaspoon vanilla
1-1/2  cups all-purpose flour
1  teaspoon baking soda
1  teaspoon ground cinnamon
1/2  teaspoon salt
3  cups Quaker Oats (quick or old fashioned, uncooked)
1  cup raisins  


Directions:


Preheat the oven to 350°F. In large bowl, beat butter and sugars on medium speed of electric mixer until creamy. Add eggs and vanilla; beat well. Add combined flour, baking soda, cinnamon and salt; mix well. Add oats and raisins; mix well. 

Drop dough by rounded tablespoonfuls onto ungreased cookie sheets. 

Bake 8 to 10 minutes or until light golden brown. Cool 1 minute on cookie sheets; remove to wire rack. Cool completely. Store tightly covered.